
Tomorrow is Jasons Birthday and I have a ton of very un-frugal things planned. When it comes to myself and things that I buy for our household I am generally pretty cheap and I always looks for the absolute best deal. But when it comes to people I love and celebrating birthdays and Christmas I tend to go all out and buy what I think they will love and make them happy!
So for dinner tomorrow we are going to Jason’s parents so his mom can make him some disgusting liver and rice dish which makes me want to vomit but also happens to be Jason’s favorite food. But to accompany the most disgusting meal ever I will be making several delicious and vegetarian side dishes! The first thing I will be making is Brie stuffed mushrooms from The Pioneer Woman Jason loves Brie and he LOVES stuffed mushrooms. Therefore it is my conclusion that Jason will love brie stuffed mushrooms! I am also making a squash gratin, which is not a favorite of Jason’s but he likes it and it will provide me with something to eat since there is a 100% chance that I will not be eating liver and rice. Last but not least in lieu of birthday cake I am making a cheesecake, from scratch, that needs to be baked!! I’m terrified. I have read no less than 100 cheesecake recipes, all of which call for different techniques, ingredients, and ways of cooking. I haven’t decided which recipe to use so I bought the ingredients for all the recipes, OCD much? If all else fails at least I have Giant Eagle right down the street which will provide me with a delicious cheesecake that will then be put on a fancy plate and be called homemade. Stay tuned for pictures and recipes tomorrow!
Showing posts with label Recipes. Show all posts
Showing posts with label Recipes. Show all posts
Tuesday, November 3, 2009
Sunday, October 25, 2009
Restocking my Pantry
Spending $5 dollars on groceries for the past 2 weeks was so helpful! I was glad that I was able to save money and use what I had on hand. I made pretty much everything that I listed before and a few additional thing, like cookies and fresh bread. The only bad thing about using things from my pantry is that now I feel like I have nothing left! So my grocery budget this week will probably be more like $40 dollars instead of the typical $20. But the way I see it, everything is evening out in the end since I only spent around $30 dollars on groceries in Oct so far instead of the typical $60 dollars that I would have spent by now.
So this week I will be cooking for myself and Jason (yay!). Im glad that he will be home and not have to travel for work for about another month or so. This week I am going to be cooking a bunch of things in the crock pot and continuing to pack my lunch every day. Here is my menu:
Breakfasts: Granola, zucchini muffins, english muffins with peanut butter, and fruit.
Lunches: leftovers, soup from the freezer (which I made last week), hummus with tortilla and carrots, hard boiled eggs, and fruit.
Dinners:
Monday- Crock pot Zucchini Parmesan- I don't use a recipe for this. I just add a jar of sauce, 2 cups of zucchini, 1 cup of ricotta cheese to the crock pot. Then sprinkle it with mozzarella cheese and bread crumbs and cook on low for 6 hours.
Tuesday- Mushroom stroganoff
Wednesday- Pierogie casserole
Thursday- Bean and rice
Friday- Creamy rice with mushrooms and peas
Saturday- Pasta with tomato cream sauce- I adapted this recipe from one I found in a cook book that I found at goodwill- classy I know. The cookbook was from the 50's and it was all about home freezing, it is quite possibly my favorite cookbook ever. Anyway, the recipe is sooo easy..
In a pan saute onion and garlic in butter (Pretty please use butter! I tried olive oil and cooking spray and neither compare to the amazing taste that the butter gives to the sauce) Once the onions and garlic are somewhat soft and translucent add one 8 oz can of tomato sauce and 1/2 cup of dry white wine. cook for about 5 minutes to let alcohol cook off. Next add the heavy cream. Simmer for 5 minutes and voila the best cream sauce ever!
So this week I will be cooking for myself and Jason (yay!). Im glad that he will be home and not have to travel for work for about another month or so. This week I am going to be cooking a bunch of things in the crock pot and continuing to pack my lunch every day. Here is my menu:
Breakfasts: Granola, zucchini muffins, english muffins with peanut butter, and fruit.
Lunches: leftovers, soup from the freezer (which I made last week), hummus with tortilla and carrots, hard boiled eggs, and fruit.
Dinners:
Monday- Crock pot Zucchini Parmesan- I don't use a recipe for this. I just add a jar of sauce, 2 cups of zucchini, 1 cup of ricotta cheese to the crock pot. Then sprinkle it with mozzarella cheese and bread crumbs and cook on low for 6 hours.
Tuesday- Mushroom stroganoff
Wednesday- Pierogie casserole
Thursday- Bean and rice
Friday- Creamy rice with mushrooms and peas
Saturday- Pasta with tomato cream sauce- I adapted this recipe from one I found in a cook book that I found at goodwill- classy I know. The cookbook was from the 50's and it was all about home freezing, it is quite possibly my favorite cookbook ever. Anyway, the recipe is sooo easy..
Tomato cream sauce
1/2 onion, chopped
1 clove of garlic
3 tbsp butter
8 oz can of tomato sauce
1/2 cup dry white wine (or chicken stock)
1/2 onion, chopped
1 clove of garlic
3 tbsp butter
8 oz can of tomato sauce
1/2 cup dry white wine (or chicken stock)
In a pan saute onion and garlic in butter (Pretty please use butter! I tried olive oil and cooking spray and neither compare to the amazing taste that the butter gives to the sauce) Once the onions and garlic are somewhat soft and translucent add one 8 oz can of tomato sauce and 1/2 cup of dry white wine. cook for about 5 minutes to let alcohol cook off. Next add the heavy cream. Simmer for 5 minutes and voila the best cream sauce ever!
Monday, October 19, 2009
Yellow cake mix turned chocolate cookies
On Sunday I had a serious craving for chocolate. I scoured my (almost barren) pantry and all I came up with was a yellow cake mix. That definitely would not help my craving for chocolate. So I scoured the internet for inspiration and came up with the idea to turn my yellow cake mix into a chocolate cake mix, and then turn the cake mix into cookies. Perfectly logical steps right?
I got the recipe from this blog, which I just found. I suggest checking it out. It has some amazing recipes!
To turn my cake mix from yellow to chocolate I added 1/4 cup of cocoa powder. Then I added 2 eggs, 1/4 cup of oil, and about 3 tablespoons of water. The original recipe from the blog above calls for 1/3 cup of oil but I used 1/4 cup and they turned out really good!
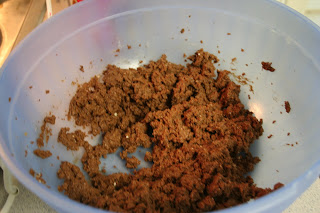 The batter kind of looks like ground meat which was gross. Luckily it smelled like chocolate!
 I then rolled the batter into calls and placed them onto a cookie sheet (which I lined with foil for easy clean up, because I'm lazy like that)
 Next I flattened them out and baked them at 350 degrees for 10 minutes.
I bet you're all wondering what professional kitchen gadget I used to flatten out all of the balls and keep them looking so uniform. Was it pampered chef? Kitchen Aid? An antique cookie press handed down for generations?
 Nope... it was happy harvest tomato sauce. Which it a very useful kitchen gadget! It serves so many functions! It can be used as a rolling pin, cookie press, meat tenderizer, and when combined with white wine, onions, and cream it makes a delicious cream sauce!
These cookies came out so so sooooo good! They are going to be my new default cookie. You can use different cake mixes for different flavors too. I can't wait to try a carrot cake and top the cookies with cream cheese icing. Yum!
my $5 a week grocery budget is working out really well! I didn't originally plan for it to include cookies but thanks to my pantry and the eggs that I bought last week I could get my chocolate fix and stick to the budget!
I got the recipe from this blog, which I just found. I suggest checking it out. It has some amazing recipes!
To turn my cake mix from yellow to chocolate I added 1/4 cup of cocoa powder. Then I added 2 eggs, 1/4 cup of oil, and about 3 tablespoons of water. The original recipe from the blog above calls for 1/3 cup of oil but I used 1/4 cup and they turned out really good!
 The batter kind of looks like ground meat which was gross. Luckily it smelled like chocolate!
 I then rolled the batter into calls and placed them onto a cookie sheet (which I lined with foil for easy clean up, because I'm lazy like that)
 Next I flattened them out and baked them at 350 degrees for 10 minutes.
I bet you're all wondering what professional kitchen gadget I used to flatten out all of the balls and keep them looking so uniform. Was it pampered chef? Kitchen Aid? An antique cookie press handed down for generations?
Nope... it was happy harvest tomato sauce. Which it a very useful kitchen gadget! It serves so many functions! It can be used as a rolling pin, cookie press, meat tenderizer, and when combined with white wine, onions, and cream it makes a delicious cream sauce!These cookies came out so so sooooo good! They are going to be my new default cookie. You can use different cake mixes for different flavors too. I can't wait to try a carrot cake and top the cookies with cream cheese icing. Yum!
my $5 a week grocery budget is working out really well! I didn't originally plan for it to include cookies but thanks to my pantry and the eggs that I bought last week I could get my chocolate fix and stick to the budget!
Saturday, October 3, 2009
Mushroom Stroganoff
Lately I have been in such a cooking rut. I feel like I cook the same meals every week- taco's, pasta, stiry fry, and soup.So last week I decided that I am going to try and make something new every week. Last week the new recipe I tried was Mushroom stroganoff. I never liked beef stronganoff when I ate meat but this recipe was amazing and really easy to make! I found it on recipe zaar. If you have never used recipe zaar go right now and use it!


Thursday, October 1, 2009
Soup, Soup, Soup
This week has been cold, rainy, and all around dreary. Yuck! This weather makes me want to put on sweatpants, lay under blankets and eat soup from my crock pot. Well not exactly from my crock pot (I just got a crazy visual of me sitting down with a spoon and my crock pot- not that it would be unheard of to do something like that), but soup that has been made in my crock pot while I sit around and eat bon bons and watch daytime TV. When I first became a vegetarian soup was one of the things that I missed the very most. Sure there are vegetarian soups out there- vegetarian vegetable, potato soup, tomato, etc But the soups I was craving were all chicken stock based soups. A lot of vegetarians just simply substitute vegetable stock for chicken stock. I am not one of those vegetarians. I have a confession to make- I. hate. hate. hate. vegetable stock. With 3 hates. Its just so gross and flavorless or the flavor it does have it that of celery. There is no need for a big pot of celery water. Yuck. Luckily I found an awesome brand of faux chicken stock at my local kosher store and it is amazing! My vegetarian soup possibilities have increased exponentially! So without further ado here are a few of my favorite soups…
Stuffed pepper soup
1 package veggie Crumbles (I use morning star or boca)
2 quarts water
1 (28 ounce) can stewed tomatoes (undrained)
1 (29 ounce) can tomato soup
2 cups cooked long-grain rice
2 cups chopped green bell peppers (about 2 large peppers)
2 tablespoons packed brown sugar
Add all ingredients to crock pot and cook on low for 8 hours or on high for 4 hours. You can substitute ground beef for the veggie crumbles but I would suggest browning it first before adding it to the crock pot.
Loaded baked potato soup
2 cups potatoes peeled and chopped into cubes
1 8oz pack of cream cheese
2 cups chicken stock
½ onion- chopped
Baked potato toppings of your choice such as bacon, chives, sour cream, etc
Combine potatoes, onion, and chicken stock in a pan and bring to a boil. Once potatoes are tender you can either mash potatoes with a potato masher, blend in blender or pulse in your food processor. It just depends on what kind of texture you are looking for. Once blended add cream cheese and stir until melted. Spoon soup into bowls and top with your choice of baked potato toppings.
Tortellini soup
4 cups chicken stock
½ onion, chopped
1 clove of garlic, chopped
1 package of frozen spinach
½ cup carrots peeled and chopped
½ teaspoon celery salt
1 package tortellini
In a sauce pan sauté onions and garlic until tender. Add all remaining ingredients except for tortellini and bring to a rolling boil. Let boil for 15 minutes or until carrots are tender. Add tortellini and cook according to package instructions. Top with parmesan cheese and enjoy!
Saturday, September 26, 2009
Dear Rain, go away!
It has been raining non stop since yesterday. Blah! Fall is my absolute favorite time of year. I love the cool crisp weather and getting to wear all of my sweaters. But wearing sweaters in this rain is really cramping my style! Wet wool is not IN this season.
The yucky weather combined by my very limited budget this week has put me in the mood for crock pot meals. So this week's menu has at least 3 days of crock pot meals. I am trying to be consistent and pot my menu every week. However my grocery shopping always varies. So like me my menu posting will be random.
Monday: Crock Pot Eggplant Parmesan with buttered noodles
Tuesday: Mushroom, onion, and green pepper stir fry over rice
Wednesday: Mushroom Stroganoff
Thursday: Crock Pot Curry over rice with homemade apple sauce
Friday: Taco Rice with tortilla chips and salsa
As you can see I never plan for weekend meals. Weekend meals are just basically whatever we have on hand to make or a meal that we eat out. During the winter though I do tend to make a big crock pot of soup on Saturdays and we will eat it throughout the day or for dinner.
I am off to put my rain boots on and head to the store! Hope everyone is having a great weekend!
Thursday, September 24, 2009
Canning Strawberry Preserves
Today I stopped by Aldi's to pick up some essentials (cream cheese, M and M's, and tortilla chips) and I saw that they had strawberries on clearence- buy one pint get one free. I got 4 pints of strawberries and pnly paid $3.80 On my way home it Dawned on my- What am I going to do with 4 pints of strawberries? I still had leftover mason jars and lids so I decided to make strawberry preserves. I used my crock pot and the tips from Grocery Cart challenge on canning and it turned out great!
Here's the play by play...
Here's the play by play...

First I cut up all of the strawberries and put them in the crock pot along with 1/3 cup lemon juice and 1/4 cup of sugar. You can adjust the amount of sugar depending on how sweet your strawberries are.

I let my strawberries cook down for 2 hours on highs. While they were cooking I put the empty mason jars in the dishwasher to sterilize and get hot.
Once the strawberries are soft you can either mash them with a potato masher or if you would like a smoother texture put them in a blender (but be careful because it will be hot and steam plus blender lid = explosion of strawberry sauce all over your kitchen!)

Once your berries are blended or mashed put them in a mason jar, wipe the rim, and put the lid on. Instead of going through the whole hot water bath ordeal just turn the jars upside down and let them sit over night or until they are cool. As they cool the seals will pop.
I have tried canning using a hot water bath and using this method. When using the water bath I would always have 2 or 3 that didn't seal. Using this method I have never had a can that didn't seal. I LOVE this method. It is so much less hassle and makes canning much more enjoyable!
While my preserves were cooking I also whipped up this cute halloween dishtowel using some old halloween material and a white towel I got at the dollar store.
Before:

After:

Today was productive and delicious!
Muffins!
In the summer breakfast usually consists of fruit or some dry cereal and tea. But as the weather gets cooler I tend to crave a hearty and more filling breakfast. Thats where muffins come in to play. They are so easy to make, portable, and very filling! Some of my favorite are pumpkin, zucchini, and this recipe for chocolate banana...
1 1/2 cups flour
1 cup sugar
1/4 cup baking cocoa
1 teaspoon baking soda
1/2 teaspoon salt
1/4 teaspoon baking powder
1 1/3 cups mashed ripe bananas
1/3 cup vegetable oil
1 egg
In a large bowl, combine the first six ingredients.
In a small bowl, combine bananas, oil and egg.
Stir into dry ingredients just until moistened.
Fill greased or paper lined muffin cups three fourths full.
Bake at 350 deg F for 20-25 minutes or until muffins test done.
Chocolate Banana Muffins
1 1/2 cups flour
1 cup sugar
1/4 cup baking cocoa
1 teaspoon baking soda
1/2 teaspoon salt
1/4 teaspoon baking powder
1 1/3 cups mashed ripe bananas
1/3 cup vegetable oil
1 egg
In a large bowl, combine the first six ingredients.
In a small bowl, combine bananas, oil and egg.
Stir into dry ingredients just until moistened.
Fill greased or paper lined muffin cups three fourths full.
Bake at 350 deg F for 20-25 minutes or until muffins test done.
These muffins are so fast and easy to make. I haven't tried the whole freezing muffins thing yet. I think I just have a misconception that they will come out soggy. Does anybody have any tips on how to defrost the muffins? Do I let them sit out over night in the fridge or on the counter? Can I microwave them to defrost? So many muffin freezing questions!
Sunday, September 20, 2009
Weekly Menu
So this week I decided to try and stretch what we had left over from last week's grocery order 1. to save money and 2. because I was feeling lazy and didn't want to grocery shop. I had to think on my feet for some of the dinners and others involve more prep than usual. Over Jason seemed pretty excited about the dinner ideas which is always a good sign!
Monday: Philly cheese "steaks"(homemade rolls with sauteed mushrooms onions and peppers covered with cheese) roasted garlic potato's.
Tuesday: Ravioli's with pesto sauce and homemade garlic bread
Wednesday: Veggie Meatloaf with mashed cauliflower and apple sauce
Thursday: Eggplant enchilada's (from my OAMC freezer stash)
Friday: Stuffed cab age soup in the crock pot
Hope everyone has a great week! I am off to make some homemade rolls!
Friday, September 18, 2009
Another Zucchini Recipe

Will the zucchini recipe's ever stop? Probably not. Especially since I have 8 gallons of sliced zucchini in my freezer. 8 GALLONS! Thats absurd. So far I have been making zucchini lasagna, zucchini cobbler, zucchini bread, zucchini stir fry... Im starting to feel like Bubba off of Forest gump when he lists all the shrimp recipes. But seriously I have been making alot of zucchini recipes! this recipe is my new favorite zucchini recipe. If you are not a fan of zucchini this recipe would be perfect for you. It doesn't really have a strong zucchini taste. Just a cheesy and gooey taste. Its cheesy and warm and it tastes really great as left overs.
Cheesy Zucchini Casserole
3 lbs zucchini
1 medium onion
5 tablespoons butter
2 eggs, beaten
1 1/2 cups shredded sharp cheddar cheese
1/2 cup flour
1/2 teaspoon baking soda
1/2 teaspoon baking powder
1 medium onion
5 tablespoons butter
2 eggs, beaten
1 1/2 cups shredded sharp cheddar cheese
1/2 cup flour
1/2 teaspoon baking soda
1/2 teaspoon baking powder
Peel and cut up the squash into chunks and dice the onion.
Add zuchini to a pot of water and boil until tender- about 15 mins
Drain the zuchini in a strainer. Allow the zucchini to sit for 10 minutes or so and gently push as much moisture out of the zucchini as possible
Add zuchini to a pot of water and boil until tender- about 15 mins
Drain the zuchini in a strainer. Allow the zucchini to sit for 10 minutes or so and gently push as much moisture out of the zucchini as possible
Next you can either mash the zucchini and butter together by hand OR take the easy route like I did and add it to your food processor and pulse it 3 or 4 times.
Mix one cup of the cheese and all the remaining ingredients with the mashed zucchini
Pour into greased pan top with remaining 1/2 cup cheddar cheese.
Bake at 350 degrees for 30 to 40 minutes, or until center is set.
Bake at 350 degrees for 30 to 40 minutes, or until center is set.
Note: I did one to eat for OAMC and it turned out great! The only thing I would suggest if you are going to freeze this recipe is to allow it to COMPLETELY thaw before cooking it. I only thawed it overnight in the fridge and it was half frozen still. Impatient me then put it in the oven and allowed it to cook for an hour and it was still not done. Finally 2 hours after putting it in the over it was done. The moral of this story- let it thaw!
Sunday, September 6, 2009
Peanut Butter Trifle
Jason's office was having a cook out and since Jason doesn't cook I helped him out and made him a dessert to take in. Aren't I a nice girlfriend? Jason loves chocolate and peanut butter so I decided to make chocolate peanut butter pie. But then I remembered that I was feeding 20 people with this dessert and I would have to make 4 or 5 pies. No thank you! So I adapted a peanut butter pie recipe I have to become a trifle. It came out so good and Jason came home with an empty bowl! Not only did I make this dessert I made this pretty photo tutorial on how to make peanut butter trifle...
 Start out by putting about 25 cookies in your food processor. You may have to do it in several batches depending on the capacity of your food processor.

Blend them until smooth and all of the cookie pieces are ground up!

Next find a pretty bowl, preferably clear. In a perfect world everyone would use a beautiful trifle bowl. But in reality I don't have one and couldn't find one at goodwill. But I did find this pretty little clear bowl for only $2.99!

Take about 1/4 of the cookie crumbs and pat them into the bottom of your pretty bowel. Set the bowl and the rest of the crumbs aside.

Next combine the peanut butter and powdered sugar in a bowl and combine until it become little peanut butter pebbles. Like so:

 Start out by putting about 25 cookies in your food processor. You may have to do it in several batches depending on the capacity of your food processor.
Blend them until smooth and all of the cookie pieces are ground up!

Next find a pretty bowl, preferably clear. In a perfect world everyone would use a beautiful trifle bowl. But in reality I don't have one and couldn't find one at goodwill. But I did find this pretty little clear bowl for only $2.99!

Take about 1/4 of the cookie crumbs and pat them into the bottom of your pretty bowel. Set the bowl and the rest of the crumbs aside.

Next combine the peanut butter and powdered sugar in a bowl and combine until it become little peanut butter pebbles. Like so:

mmm Peanut butter pebbles.


Next add the cream cheese to the peanut butter pebbles.

Then add the whipped cream. You'll notice that my bowl is getting pretty full. That's because I doubled the recipe to feed Jason's entire office and to fill up my big bowl.

mmm light and fluffy peanut butter goodness
Finish it off by layering the peanut butter mixture with layer of the cookie crumbs and voila chocolate peanut butter trifle.

Enjoy!
Here is the exact recipe to follow since this is my first photo tutorial and has the potential to be a little shotty.
You will need:
Next combine powdered sugar and peanut butter.
Once combined add cream cheese and combine.
Next add cool whip and combine until there is no white left- just beautiful fluffy peanut butter. Layer cookies and peanut butter in a pretty clear bowl.
This is a difficult step but a very important one... Let the bowl sit in the fridge for at least an hour. Take that hour to lick the beaters, bowl, spatula, and any other object that the peanut butter mixture has come in contact with.
After an hour the peanut butter mixture will set up a little more like cheese cake consistency and voila you will have yourself a peanut butter trifle!
Here is the exact recipe to follow since this is my first photo tutorial and has the potential to be a little shotty.
You will need:
25 oreo's
1 cup creamy peanut butter
1 8-ounce package softened cream cheese
1 1/4 cups powdered sugar
1 8-ounce package Cool Whip, thawed
Next combine powdered sugar and peanut butter.
Once combined add cream cheese and combine.
Next add cool whip and combine until there is no white left- just beautiful fluffy peanut butter. Layer cookies and peanut butter in a pretty clear bowl.
This is a difficult step but a very important one... Let the bowl sit in the fridge for at least an hour. Take that hour to lick the beaters, bowl, spatula, and any other object that the peanut butter mixture has come in contact with.
After an hour the peanut butter mixture will set up a little more like cheese cake consistency and voila you will have yourself a peanut butter trifle!
Friday, September 4, 2009
DipTacular!

Boo Mama is having a dip tacular today and if there is one thing that I am a fan is a good dip! Actually there is more than 1 thing that I am a fan of, but in the top 5 food section dip is included. A few of my favorites lately have been artichoke and tomato, honey peanut butter, and this dip for "sophisticated queso". I really need to find a better name for this dip because a dip that include an entire pack of velvetta just doesnt scream sophisticated to me. But meh I am a fan none the less.
Disclaimer- This is the only pic of this dip that I have. Its a bad picture because it was hard enough to take a second and photo this dip before eating it. But in real life this dip is a really pretty orange color with flecks of red pepper. Kind of like a monet, that you want to eat with tortilla chips! Yum!

1 large pack of velvetta cheese (Im not sure of the ounce but its the biggest one they make)
3 roasted red peppers, deseeded (If your feeling lazy, as I usually am, you can use the jarred one which are already roasted and delicious!)
1/2 an onion
1 small tomato
2 cloves of garlic
In a blender puree the red pepper, onion, tomato, and garlic. Pour the mixture of the cheese dip in either a crock pot or in a sauce pan. If you use a crock pot just put it on either the warm setting or low until the cheese is melted. If your using a sauce pan just put it over low heat until melted!
I have a ton of projects to complete this weekend including some sewing, finishing my bathroom (as in 100% everything is finished!), and working on converting out spare room into a cute craft/exercise/laundry/ walk in closet. High aspirations right!? Hopefully I will keep you updated with pics as the weekend progresses!
Happy 3 day weekend!
Monday, August 31, 2009
Meal Planning Monday
I've decided to participate in this week's menu planning at Org Junkie. I plan a rough idea of what I will make in a week but lately I have been throwing the plans out the window and making quesadillas every night. Its hard when its just two people for dinner. I like the freedom to not HAVE to plan but I definately benefit from following a stricter plan each week. Hopefully having a plan in writing will hold me more acountable and make me stick to it! Click on the button below to see more menu plans.

Monday: Roasted brussel sprouts, Au Gratin Potatoes, and homemade chunky apple sauce
Tuesday: Taco's using veggie crumbles and spanish rice
Wednesday: Going to my mom's for dinner. I will be taking over some homemade applesauce (which I will be making on Monday)
Thursday: Zucchini Lasagna and possibly some homemade bread if I am feeling ambitious
Friday: Zucchini casserole, which I made a few weeks ago and froze
Saturday: Stir fried broccoli with rice
Sunday: randomness- usually I will make some sort of dip with chips and some vegetables and whatever left overs there are from the past few days.
Hope everyone has a wonderful week!
Friday, August 21, 2009
Eggplant-A-Paloza
 Jason and I decided to plant eggplant in our garden this year. Neither of us really love eggplant but it is good every once in awhile. So when we went to buy plants we though that eggplants grew one vegetable per plant. Kind of like cabbage or cauliflower. Looking back I'm not really sure what made us think this. However at the time it sounded right. So we bought three eggplant plants, thinking three eggplants would be the perfect amount. All I can do now is laugh as we have picked at like 10 egg plants already and more are still coming! I have given some away, frozen some, used some in casseroles, you name it and I have done it to an eggplant! I stumbled across this recipe on Recipe Zaar awhile back and it sounded pretty good. Well now that I have a dozen eggplant it sounds great! so without further ado here is the recipe...
Eggplant "Meatballs"
1 large eggplant
2 beaten eggs
1/3 cup parmesan cheese
1 teaspoon mixed Italian herbs
1 teaspoon garlic powder
1 teaspoon onion powder
black pepper, to taste
Salt, to taste
1 cup breadcrumbs
Slice eggplant and sprinkle with salt.
Let sit 10 minutes to draw out water.
Rinse and pat dry.
Saute on stovetop with a splash of olive oil and about 1/4 cup water until eggplant is soft.
Remove and chop finely.
Mix everything but the breadcrumbs when eggplant is cool.
Then add breadcrumbs and mix until you get the consistency you want to form the balls.
Place in a generously olive oiled pan about l inch apart and bake at 400 degrees until golden brown, about 40 60 minutes.
Turn halfway through baking to ensure even browning.
For more recipe's check out the recipe swap going on over at The Grocery Cart Challenge
Thursday, August 20, 2009
This is why I am not a professional landscaper!
On Mondays and Thursdays I work from home. I looooove it. I do part of the work the night before and then leisurely finish up what I have to do the next day. So today I woke up did a little work and then felt motivated to do something. I started with the 10 loads of laundry that needed done. I got 2 loads in and was bored. Who has time to wait around for 30 minutes between loads? So next on my list was to bake Jason some chocolate chip cookies, Jason LOVES chocolate chip cookies. I always try a new recipe because I am always in search of the perfect chocolate chip cookie. I tried this recipe today from all-recipes. I am not usually a fan of all recipes but the recipe got good reviews. The cookies came out okay. Better than some I've made but not quite as good as others. I had to use half white chocolate and half milk chocolate chips.

Pioneer Woman has a recipe that includes instant coffee in her chocolate chip cookies. I reeeally wanted to try and make her version but I didn't have any instant coffee. Maybe Next Thursday!
So after my domestic extravaganza I decided to cut some of the grass to surprise Jason when he gets home. He hasn't had a chance to cut it since he's gotten back from Ca. Between 98 degree days and crazy thunderstorms there just hasn't been a day to do it. So i went out started up the mower and was just walking back and forth back and forth. Cutting grass is so boring to me! So I get by our sickle pear tree and keep on cutting when all of a sudden I start slipping and slidding all over the place on the pears on the ground. It was probably a hilarious sight for all of my neighbors. Thank goodness I didn't fall of I probably wouldn't be laughing now!
Hopefully Jason is happy when he gets home and finds not only grass that doesn't need cut but chocolate chip cookies too!
Tomorrow I have decided that I am going to try and can my own salsa. We have a bunch of tomatoes from the garden and I have already froze so many that I want to try something different. I found a couple of recipe's off of Recipe Zaar that look good but I am still looking. If anybody has any good salsa recipes that work for canning feel free to send them my way!
Monday, August 17, 2009
Goodbye Vacation, Hello Real World
Jason and I just got back from San Diego on Saturday. All I can say about my trip is WOW! I LOVED San Diego! it was sunny and warm every day! I spent my days going to the beach, napping at the pool, eating sushi, and cooking Jason home cooked dinners (since he hadn't had any in a month!)
I took so many pictures but here are just a few..
 This is the Hotel Del Coronado. Its a swanky historic hotel right on the beach. It was BEAUTIFUL!
 This is the beach at sunset one day. I told Jason it looks like a picture off of a postcard!
 This is Lake Hodges which was just created in 2002. It was neat to see a man made lake. The mountains behind it were awesome!
 This is our pelican friend from the first day we went to the beach. We went to the beach in Oceanside which was very crowded but still very nice!
I think that I would move to California in a second. Although I would miss the snow and fall here! I am already excited for Western Pa fall and August isn't even over yet!
Since we've been back I have been pretty busy cleaning and just trying to get back into the groove of things. On Saturday when I got back I found this recipe on RecipeZaar that has the abbreviation OAMC after it. I was curious so I read the recipe and found out it was for the once a month cooking method. The method itself sounded pretty insense! Grocery shopping and cooking 30 meals all in one day! I don't think I would ever be able to do that. Not to mention that there are times when I enjoy cooking. But I did make several of the recipes to freeze and have on hand for time when I don't feel like cooking.
The recipes I made were Eggplant casserole, Mexican rice, and Zucchini Casserole. I'm excited to see how they turn out. I'm always nervous about freezing fod because if it doesn't turn out well then I just wasted all the ingrediants and time making that dish. Does anybody have any tips on freezing? Food that doesn't freeze well or food that does feeze well? Your tips would be greatly appreciated!
Thursday, August 6, 2009
What a week!
Thanks to Pennsylvania's wonderful govenor the state budget has not been passed. This means that all of the state worker have not been paid for over a month. I do not work for the state but rather a state supported agency which provides social services to the elderly population in my county. Up until now we have been paid since some of our funding does come from other sources and not just from the state. Well this week we found out that our "other sources" of income cannot sustain us any longer and they must cut our saleries until the budget is passed. So if I wasn't living as frugal as possible before I SURE will be now! Hopefully this is just for a month or so and then the budget will be passed. Im not too worried about losing my job because the client that I help have services that are mandated by the state, meaning that they have to have a social worker no matter what.
But on a brighter note I just found this great recipe for zucchini cobbler! I haven't tried it yet since its just me here for another week until Jason comes home. But when he comes home I definately intend to make it! I will share the recipe though with you guys and if anybody makes it in the mean time please tell me how it turns out!
But on a brighter note I just found this great recipe for zucchini cobbler! I haven't tried it yet since its just me here for another week until Jason comes home. But when he comes home I definately intend to make it! I will share the recipe though with you guys and if anybody makes it in the mean time please tell me how it turns out!
Zucchini Cobbler
8 cups zucchini
1 cup sugar
3 tablespoons flour
1 dash salt
1 teaspoon cinnamon
3/4 teaspoon cream of tartar
1 tablespoon lemon juice
1 (10 ounce) can crushed pineapple
1 box yellow cake mix or white cake mix
1/2-1 cup butter, melted
1 cup sugar
3 tablespoons flour
1 dash salt
1 teaspoon cinnamon
3/4 teaspoon cream of tartar
1 tablespoon lemon juice
1 (10 ounce) can crushed pineapple
1 box yellow cake mix or white cake mix
1/2-1 cup butter, melted
Peel zucchini and remove seeds. Dice into bite size pieces and boil until zucchini is tender (about 8-10 minutes). Drain and cover with cold water to stop the cooking process. Next in a bowl combine sugar, flour, salt, cinnamon, cream of tartar, and lemon juice. Drain zucchini and add to mixture. Next add pineapple and juice and combine. Pour mixture into a greased 9x13 pan. Sprinkle dry cake mix over the top and drizzle with melter butter. Bake at 350 for 60 minutes.
This recipe reminds me of the fruit cobbler recipe that i posted on here before which called for a cake mix to be sprinkled on top and then baked. I was hesitant and didnt think that the cake mix would get moist enough but sure enough it was great!
Hope everyone is having a great week!
Monday, July 13, 2009
When the moon hits the sky...
For the past few months I've been trying to perfect my pizza making skills. It was touch and go for awhile. There were several nights that it felt like we were eating cardboard with sauce and cheese. For once in my life though I decided to actually stick to something and see it through and the results were definitely worth it!
The recipe I used made two medium sized pie's.

I topped one with mushrooms, red sauces, and fresh mozzarella. (I was taking the pizza's to Jasons parents for dinner and only half baked them at my house then baked them for the last few minutes at Jason's parents- Hence then light colored crust and unmelte cheese!)

and for the second I used fresh basil from the garden, tomatoes, and fresh mozzarella. Instead of using sauce I topped it with a little olive oil and garlic.
The best part about these pizza's was the price. The only things that I didn't have on hand to make the pizza with was the mozzarella. Everything else either came from the garden or I had in the pantry. I even got the mozzarella at Adli's for a mere $2.19, which was enough for both pizza's plus a little extra left over.
So without further ado here is the recipe.
The best pizza crust ever...
1 cup warm water
3 cups all purpose flour
2 teaspoons active dry yeast
2 tablespoons sugar
2 teaspoons salt
2 tablespoons olive oil
In a small bowl combine water, yeast, and sugar. Let mixture sit for 10 minutes to proof. (This is THE most important step and one that I always skipped until this recipe, hence the cardboard) Meanwhile in a large bowl combine remaining ingredients and mix thoroughly. After yeast is frothy and well proofed add it to dry ingredients. Mix all ingredients until combined and then transfer to a floured surface. knead for about 4 minutes or until your arms feel like their going to fall off. Put dough into an oiled bowl and cover with a tea towel. Let bowl sit in a warm place for 45 minutes.
Once yeast has risen for 45 minutes divide dough into 2 pieces and roll out into a circle. Cover with sauce and toppings of choice and bake at 500 degrees for 10-12 minutes. (Mine got a little two brown towards the end so for the second pizza I baked with foil over it for the first 5 minutes. If you like crispy crust I would skip this step!)
For more frugal recipe's check out the recipe swap going on over at The Grocery Cart Challenge.
Friday, June 5, 2009
Veggie Cakes
Our garden is growing like crazy thanks to all the rainy days we're had here in western Pennsylvania. Last summer, before our garden, we made trips to the local farmers market and always had so many great vegetables on hand. The only downside to they amazing fresh produce was that by August I had exhausted every recipe I had for a quick vegetable dish. One day when I was thinking about how to use my leftover zucchini, squash, carrots, etc I decided to make some veggie cakes. I was skeptical at first but they turned out so great I make them all the time now.

Veggie Cakes
1/2 cup zucchini
1/2 cup squash
1/4 cup carrots
1/4 cup onions
bisquick
1 egg (in addition to the egg called for by the bisquick recipe)
Shred all vegetables and put in strainer to let excess water drain off. While vegetables are draining follow directions on bisquick box to make 4 pancakes. Add pancake batter to vegetables and mix well. Next add 1 egg and combine wit mixture. Heat a small amount of oil in pan or on griddle. Drop about 2 tablespoons of batter onto a skillet and cook about 3 minutes on each side or until golden brown.
I usually serve these with a green salad with a tangy dressing. The dressing with the veggie cakes just seems to compliment each other. I have also made these by adding or substituting other vegetables like mushrooms and green peppers. These are super simple and so good!
Tomorrow I am going to a Fleatique in my hometown. There will be 3 miles of vendors selling crafts, antiques, baked goods, books, as well as families having yard sales. I'm like a little kid on Christmas because I am so excited to go!
If anybody is in the area and would like to check it out here is the link...
Wednesday, June 3, 2009
Yes, it's another post about dinner
I got home from work tonight and felt like making a dish of absolutely nothing for dinner. For some reason my 1 hour and 15 minute commute just doesn't put me in the mood to come home and cook a 5 course meal. However like a good girlfriend I sucked it up and made the easiest and fastest thing I could think of. Luckily it used up the green pepper that was beginning to turn mushy.
Deconstructed Stuffed Peppers
1-2 green peppers (depending if you eat a whole or half)
1 bag instant rice (I use brown but use whatever you have)
1 can crushed tomatoes
1 1/2 cup water
4 green onions
1 1/2 cup TVP (or for all you meat eaters, 1 1/2 cup ground meat)
Cook the rice according to directions and set aside. Next cut green peppers in half and roast in the over at 425 for 15 minutes or until soft. If the pepper is really thick or tough I will boil it for a few minutes prior to roasting. While pepper is roasting put tomatoes, water, half the chopped onions and cooked TVP in a pan. Once the mixture comes to a boil and starts to thicken add the rice.

Place half or a whole green pepper in a bowl and top with the tomato, rice, tvp mixture and voila deconstructed stuffed pepper.

I realize this isnt an exact stuffed pepper like most people are used to. However it takes about 20 minutes to make as opposed to the typical hour it takes just to stuff the peppers. I hope you enjoy!
Subscribe to:
Posts (Atom)


